A 480 by 320 panel. Touch native.
WHY
More pixels. Less typing.
The OLED is the always-on glance. The touch panel is what you reach for when you need to do something. Color, fonts that read at a distance, and gestures that mean what they mean on every other touchscreen.
| Item | OLED | Touch panel |
|---|---|---|
| Resolution | 128 x 64 | 480 x 320 |
| Color | ||
| Touch input | ||
| Screens | 1 status page | 5 tabs plus detail pages |
| Driven by the four buttons |
Resolution
OLED (128 x 64), Touch panel (480 x 320)
Color
Touch panel
No oled
Touch input
Touch panel
No oled
Screens
OLED (1 status page), Touch panel (5 tabs plus detail pages)
Driven by the four buttons
Touch panel
No oled
Looking for the OLED and four buttons? That is the Physical UI page.
INSTALL
Plug it in. Reboot. It works.
One install command picks the panel up from the board profile, compiles and installs the device-tree overlay, registers the kernel modules, and primes touch. No dtoverlay edits, no kernel rebuild.
1. Detect
The board fingerprint resolves a hardware profile. The profile lists one or more supported displays. The installer picks the first match, or honors a flag when the operator wants a different one.
2. Provision
The overlay source compiles to a device-tree binary. Modules load on every boot. Resolution, rotation, and touch state land in a single config file the renderer reads at startup.
3. Bind
First boot brings up the panel. The renderer probes the framebuffer, the touch bridge attaches to the input device, and the Display tab in Mission Control populates with live state. No follow-up commands.
DASHBOARD
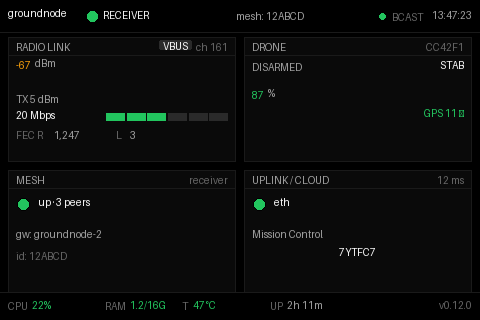
Native 480 by 320. Four tiles. One tap to drill in.
The dashboard is purpose-built for the panel: bigger fonts and four stat tiles for the radio link, the drone, the mesh, and the uplink and cloud. Each one is a tap target, and a tile with nothing to show yet swaps to its setup step.
Tap a tile to drill into that subsystem.
STATUS
Five read-outs. One glance each.
Link, drone, connected clients, network, and system, each on its own screen in type you can read at arm's length.
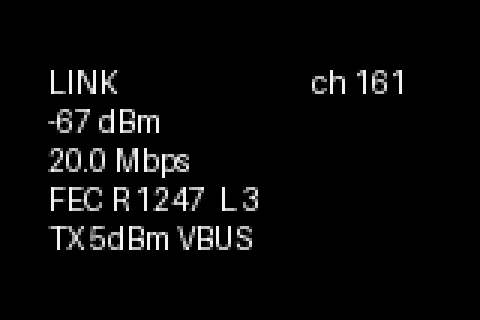
Link
RSSI, bitrate, FEC repaired and lost, channel, TX power.
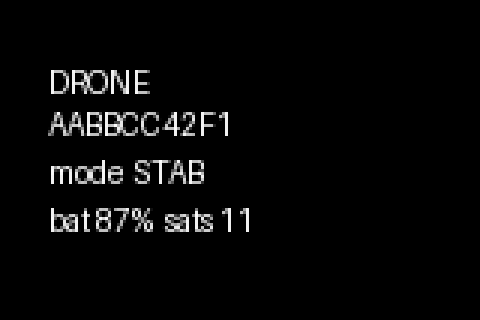
Drone
Paired device id, flight mode, battery, GPS satellite count.
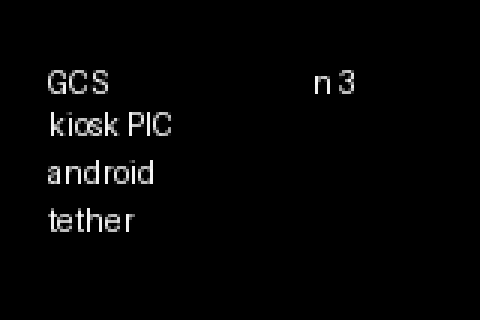
GCS
Connected client list with the pilot-in-command marker.
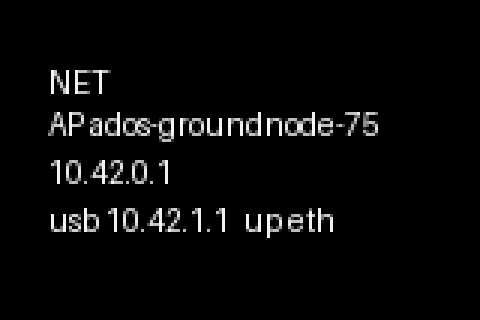
Net
Access point SSID and IP, tether IP, current uplink and reach.
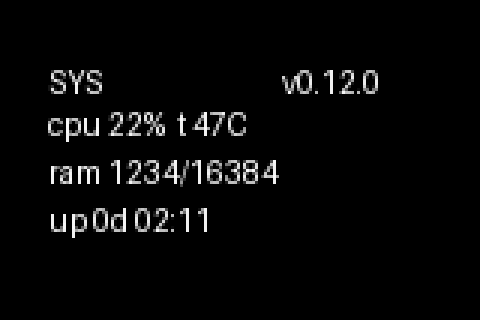
System
CPU, RAM, temperature, uptime, agent version.
MESH PAIRING
Open a window. Join. Approve.
A receiver opens an accept window, 60 seconds by default and anywhere from 5 to 300. A relay asks to join, the receiver approves, and a sealed invite brings the relay onto the mesh. Each state has its own screen.
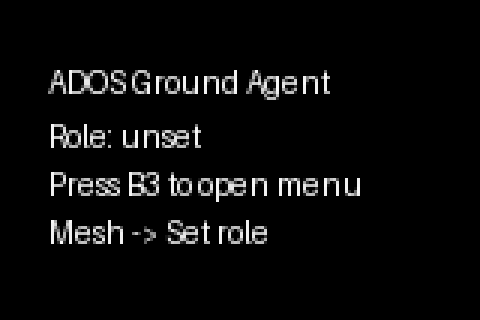
First boot. Role unset. A hint is shown.
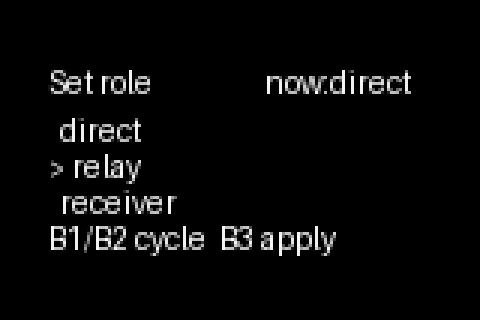
Pick direct, relay, or receiver.
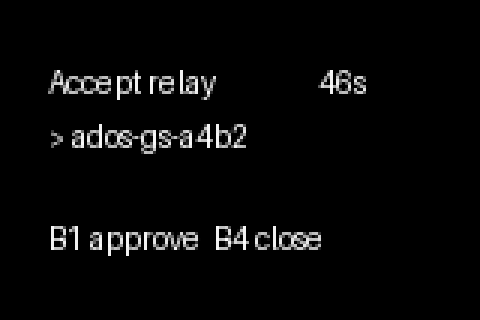
Receiver accept window, 60 seconds by default.
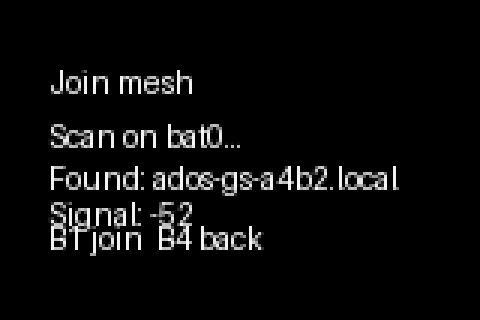
Relay scanning for the receiver.
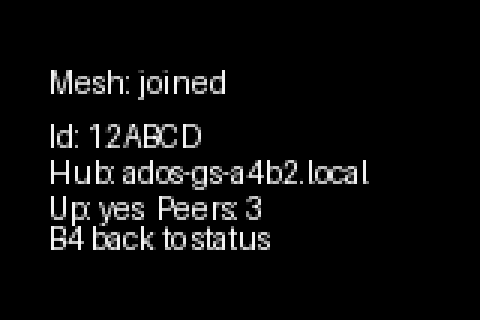
Mesh up. Confirmed on both ends.
OVERLAYS
Every transition has its own screen.
Recovery, confirmation, and list views. A node without a second WiFi adapter shows a hint screen instead of a silent empty menu, so the operator knows the mesh exists and how to unlock it.
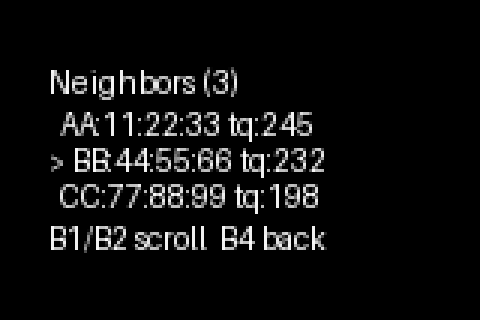
Neighbors with link quality
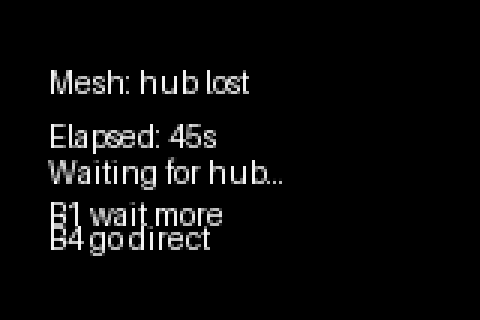
Receiver lost, grace period
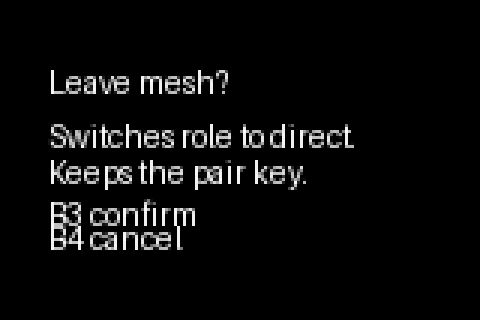
Confirm before leaving the mesh
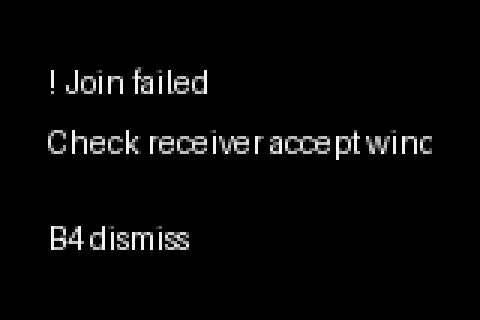
Unified error overlay
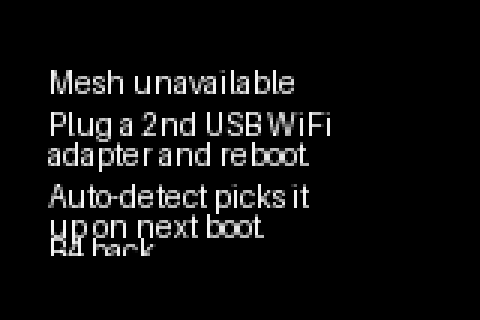
No second WiFi adapter
TOUCH
Tap. Swipe. Long-press. Drag.
Every gesture is classified with the same thresholds on every screen, then tested against the hit zones of the page that is showing. A tap in the bottom strip always switches tabs.
HARDWARE
Four boards today. The profile system takes more.
A new board adds a displays block to its hardware profile and the installer picks it up. No code change in the renderer.
| Cubie A7Z | Rock 5C Lite | Raspberry Pi 4B | Raspberry Pi 3 | |
|---|---|---|---|---|
| SoC | Allwinner A733 | RK3582 | BCM2711 | BCM2837 |
| Panel | Waveshare 3.5" RPi LCD (A) | Waveshare 3.5" RPi LCD (A) | Waveshare 3.5" RPi LCD (A) | Waveshare 3.5" RPi LCD (A) |
| Display driver | ILI9486 | ILI9486 | ILI9486 | ILI9486 |
| Touch | ADS7846 | ADS7846 | ADS7846 | ADS7846 |
| Resolution | 480 × 320 | 480 × 320 | 480 × 320 | 480 × 320 |
SoC
Panel
Display driver
Touch
Resolution
Display profiles live in each board profile. Adding a new pair is a profile change plus an overlay file.
MISSION CONTROL
The GCS sees what the panel sees.
The Display tab in Mission Control mirrors the panel: its type, controller, theme, last-touch age, the page it is on, and calibration state. Ask for a calibration from the desk before the operator walks out the door.
Live mirror
The local-display card shows up the moment the panel binds. If the panel goes dark, the card flips to a degraded state without taking down the rest of the Display tab.
Calibrate from the desk
The nine-point calibration wizard runs on the panel itself, and Mission Control can open it remotely. The fit is saved on the node, so the field operator never picks up a drifting surface after a reboot.
A panel for the field. A tab for the desk.
Wiring, calibration, and supported displays are in the public docs.
Display docs